Divers Chef Knife Storage
How to Organize and Store Your Kitchen Knives Block Set Safely
Having a nice set of kitchen knives can make cooking easier and more enjoyable. But it's important to store your knives properly so they stay sharp and you avoid accidents.
In this blog post, we’ll go through how to organize your knife block set and store it safely.
Know Your Knives
The first step is learning about the different types of knives in your set. Here are some of the most common:
-
Chef's knife - This is your main knife for chopping, slicing, and dicing. It has a wide blade that curves up at the tip.
-
Paring knife - A small knife for peeling, coring, and precision cuts. Good for details.
-
Serrated knife - The scalloped blade can cut soft breads and foods cleanly without squashing them.
-
Utility knife - Similar to a chef's knife but smaller. Good for cutting fruits and vegetables.
-
Carving knife - Long, narrow, sharp blade to slice roasts, poultry, and other meats nicely.
-
Steak knives - Serrated blades that are perfect for cutting steaks without tearing them.
You may also have a honing steel, which you can slide blades against to keep them straight, and kitchen shears for cutting meats off bones or cutting open food packages.
Knowing each knife's purpose helps decide where to store them.
Choose Storage Location
When picking a storage spot, you want it somewhere:
-
Close to where you cook so the knives are convenient to grab
-
Out of reach of small kids and pets
-
Away from hot surfaces like the stove or oven
-
Not exposed to moisture which can damage blades
Many people use a countertop knife block, knife strip, a drawer organizer or a wall-mounted magnetic strip. Think about your kitchen layout and cooking style. Store your knife set where it makes the most sense.
Arrange Knives in Block
Once you decide on storage, figure out your knife arrangement. This step matters! Smart organization means you intuitively grab the right knife each time. It also keeps the blades safe.
In a countertop wooden block, first remove any filler slots. Then map out positions from top to bottom:
-
Top row - Place your most-used go-to knives here like your chef's knife, paring knife and utility knife. Keeping everyday tools on top minimizes digging time.
-
Middle row - Good spot for serrated bread knives, carving knives or other long blades.
-
Bottom row - Store steak knives and less-used knives (like the boning knife) down here. Hardly-used items belong on the bottom.
Always insert knives edge down - never up. Dropping an upside-down knife means an accidental finger slice! Edge down keeps the blades secure if the block tips. Angled tip-first insertion also prevents scratches to lower knife handles.
Use Blade Guards
Before you pack knives into the organizer, always slide on blade guards. Guards are plastic sheathes that protect both the knife edges and you. Applying guards prevents nicks to the sharpened sides. And sheathing pointy tips stops pokes, especially when reaching into a cluttered drawer.
Most knife sets include guards. If not, you can buy a multi-pack for cheap. Put a fitting guard on each blade - don't be lazy here! It takes 60 seconds and saves someone a cut.
Separate Knives in Drawers
If you are storing them loosely in a kitchen drawer, use blade dividers. These plastic inserts create slots that keep knives from banging and scraping together. Slide each knife (with guard on!) into its own protective channel.
An alternative is buying a specialized drawer knife organizer. These trays have pre-divided sections molded to hold knives individually. Look for ones where blades sit tip-down for safety.
Either method lets you access knives easily without chaotic clangs or scratches. Both options work great.
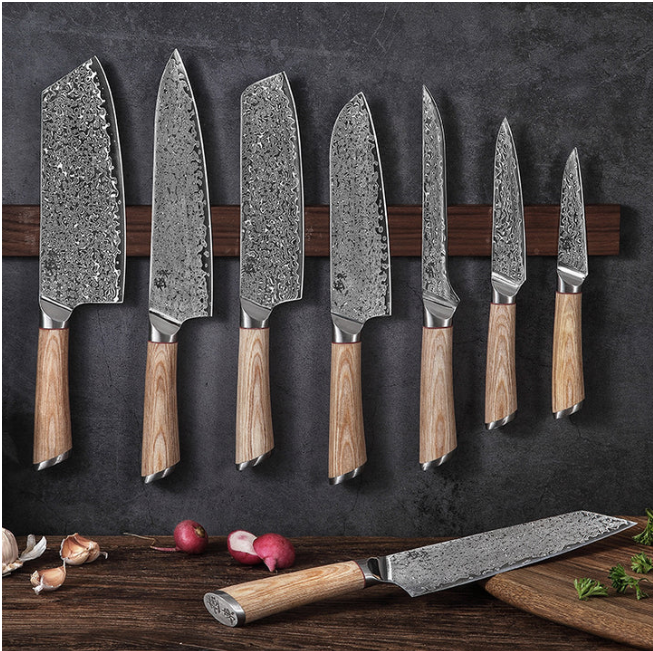
Mount Knife Strip Properly
Wall-mounted metal knife strips neatly show off a collection. But lifting knives on and off risks drops. And so mount any strip at a safe height to reduce fumbles.
Make sure screws hit a wall stud too! Random drywall toggles can rip out underweight. Use a stud finder and anchor in wood studs only. This prevents the loaded strip from crashing down.
When removing knives, always grasp them by the handle. Never grab near the exposed blade! And slide knives gently into empty slots - no quick stabbing motions.
Where to Place Your Knife Block
When deciding on a home for your knife block, you have a few good options to consider.
Many people choose to keep their knife block on the countertop for convenient access while cooking. Just make sure to place it:
-
Away from the stove or oven - Protects plastic handles from melting near heat sources
-
Not on the edge of the counter - Reduces the risk of it falling to the floor
-
Near your main prep area - Saves steps when chopping ingredients
For small kitchens short on space, wall-mounted knife strips work nicely. Mount them close to where you cook but out of toddlers' reach.
You can also store a knife block in a kitchen Sakuto Knives drawer. Select a wider, deeper drawer so the entire block fits without cramming. And stick to dedicated knife-only drawers - no loose tools knocking into exposed blades!
Inserting Knives into a Block
Sliding knives carefully into a countertop woodblock takes a light touch. Don't toss them in haphazardly. Do so carefully so that blade edges don't nick each other through sloppy handling.
Always insert knives tip-first at an angle, edges facing downwards. This prevents scratches to other blade sides or scuffs to lower handles. Grazing downward is safer than clanking upwards.
Gently ease knives into openings without any quick, stabbing motions. Take it slow. Finesse them into empty slots one by one. Rushing this risks cuts to your fingers or palms as you release the blades.
And don't try jamming knives into too-snug holes. This strains the wood and metal, leading to cracks. If a knife doesn't slide into a slot smoothly, rearrange your tools.
Matching Knife Handles and Guards
Hunting through a chaotic pile of blade guards to cover your knives is annoying and risky. Creating a logical handle-to-guard pairing makes much more sense!
Start by counting how many knives are in your collection. Then get an equal number of blade guards so every tool gets covered. Next, assign a guard to each knife handle.
Use visual cues to pair them up. Maybe a green guard always protects the chef's knife with the green plastic handle. And a red holder matches your utility knife grip.
You can mark both guards and handles using paint pens if needed. Dabs of color, stripes, or other symbols designate exclusive partners. With this, matching handles to sheaths becomes easy and thoughtless!
Key Takeaways for Safely Organizing Your Knives
-
Know which knives suit different kitchen jobs
-
Place storage where knives are handy when cooking but out of kids' reach
-
Insert knives tip down and angle sideways in blocks
-
Always use blade guards to avoid nicks and cuts
-
Mount wall-hanging strips securely into studs
-
Practice focus and control when handling sharp knives
Staying organized and alert prevents so many accidents with knives.