How To Tie Speargun Bands
How To Tie a Speargun Bands
This is a step-by-step guide of how to tie a speargun band. Spearguns are a critical part of spearfishing, and the bands are what power the speargun to shoot the spear shaft. In order to save money, time, and trips on the water, learning how to tie your own bands is essential. This is how we tie bands.
Step One: Measure and Cut to Length - How to Tie a Speargun Band
The length of your bands should be based on the length of the speargun. The longer the speargun, the longer the bands should be. Generally, the ideal length of a spearguns band is 350% stretch. For more information on how to measure the right length of your bands read this article. The bands should be measured on a flat surface without tension when they are cut.
Step Two: Lubricate Wishbone
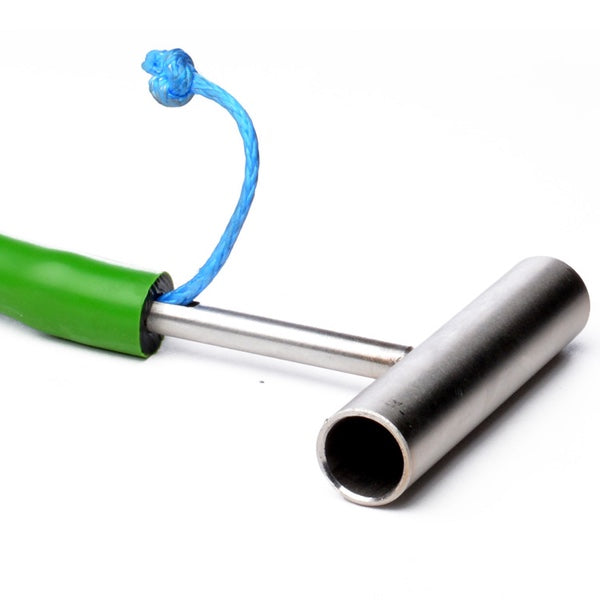
Then, put the ball of your desired wishbone into the Wishbone Insertion Tool and lubricate the wishbone. We prefer to use spray silicone to lubricate the wishbone. An alternative is to use soap, or even spit in a pinch. This is a small, but important step. Trying to push dry Dyneema and metal into latex band material is extremely difficult without lubrication.
Step Three: Insert Wishbone
The wishbone should be pushed into the band about an inch to an inch and a half. You want to put the wishbone at least that far into the band to allow ample space to tie the constrictor knot. If you have small internal diameter bands, this is particularly difficult. For those small ID bands, we recommend drilling out the first two inches of the band on either side. This allows you to insert the wishbones more easily.
Step Four: Tie the Constrictor Knot
The constrictor knot is the ideal knot to tie for speargun bands because it is a self tightening knot. What that means is that the knot can be loosely tied anywhere on the rubber, but needs to be tightened close to the end. Having the band tightened close to the end helps prevent the bands from getting tangled. When tightening these bands, you have to tighten pretty hard. It is easiest to tie the tag ends of the constrictor know to the wishbone insertion tool and a cleat in order to tighten. If you don’t have a cleat handy you can use a second wishbone insertion tool or a screwdriver in a pinch. Apply gradual pressure to the knot to ensure it tightens enough to prevent the wishbone knots or beads from pulling out of the band when stretched.
Step Five: Cut Constrictor Cord Ends
Once the knot is tied, cut the cord close to the bands. You want these close to the knot to prevent possible entanglement. If tag ends are too long they can get caught on your shooting or reel line.
Step Six: Burn the Ends of the Constrictor Knot Cord
Burn the ends to prevent the cord from fraying. While simple, this step is an important part of how to tie a speargun band. It ensures the bands survive through their useful life. That being said, bands only last about 6 months to a year depending on their use and how they are stored.Step Seven: Pull the Bands Through the Band Slot
If your speargun has an enclosed band slot, this step is very important, and it's important that you do it BEFORE closing the band. Simply push the not inserted wishbone through the band slot and pull the band through the slot. If you have silicone spray available to lubricate the band, it can make this process easier. If your speargun has an open band slot, this step can be skipped.
Step Eight: Insert Wishbone and Tie the Band
Insert the wishbone into the end of the band using the wishbone insertion tool. The rest of this follows steps two through six, but you finish the other side and close it. If your speargun has an open band slot, you can finish the band before putting it on the speargun.
P.S. : Open and Closed Band Slots
Steps Seven and Eight invite the question of why some spearguns have open band slots or closed bands slots. The simple answer to why every gun's slot isn't open is that closed band slots tend to be more structurally sound. Gun builders that are trying to make streamlined spearguns tend to stick with closed band slots.
