How to Splice A Spectra Slip Tip
How to Splice A Spectra Slip Tip
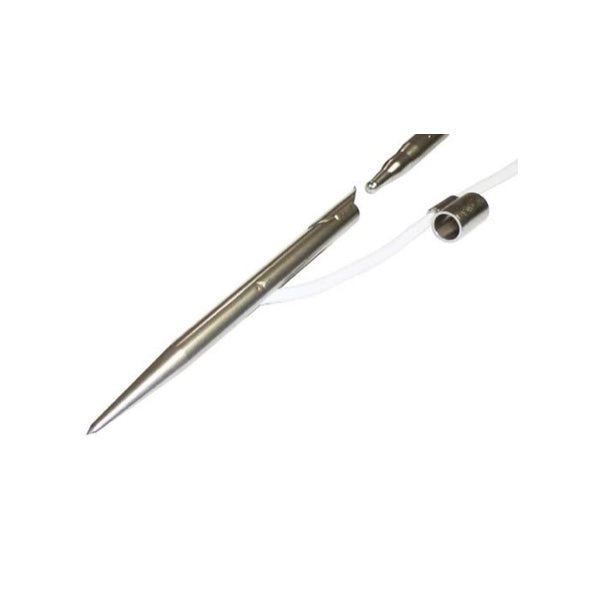
While bluewater spearfishing we often use a slip tip to help land the fish. This post will go over a step by step description of how to splice a spectra slip tip when you need to replace the spectra. There are two broad categories of slip tips on the market. There is the cable slip tip and the spectra slip tip. Choosing between the two can be a difficult decision and are better explained in this other blog post. You should consider replacing the spectra before any major bluewater trip. Replacing the spectra can mean the difference between landing a fish of a lifetime and losing a slip tip.
Items Needed: Tools and Materials for Splicing a Spectra Slip Tip
- 48” of Hollow Core Spectra
- Slip Tip Head
- Slide Ring
- Splicing Tool
- Cutting Tool (Razor Blade or Scissors)
Step One: Preparation
Gather all of the materials and tools you will need to replace and splice a spectra slip tip. You will additionally need to cut away the old spectra from the slip tip and remove the slide ring from the spectra.
Step Two: Spectra on the Slip Tip Head
Take the 48” of hollow core spectra and slide one end through the post within the slip tip. From there you need to bring the two ends of the spectra together. Pull the slip tip head to the half way point of the spectra.
Step Three: Start the Splice
Take your splicing tool and gently push the tip into the center of the hollow core spectra. Work the splicing tool up though the spectra up to the slip tip head. Make sure you keep the splicing tool within the spectra the entire distance.
Step Four: Pulling the Splice
Once you have pushed the splicing tool through the spectra to the half way point of the spectra, where the slip tip head is, push the tool out of the spectra. Once the tool is out it essentially forms the eye of a needle. Take the opposite end of the spectra and thread it through the eye of the splicing tool. From there you need to pull the other end of the splicing tool and pull the end of the spectra through the core of the hollow core spectra. Once it is through pull the inner core tight and remove as much slack as possible from the outer spectra. The inner spectra should be a little longer than the outer spectra.
Step Five: Cutting Spectra and Adding the Slide Ring
Pull the outer core of the spectra and inch or so back on the inner core of the spectra and cut the inner core of spectra at that point. Once again, pull as much of the slack as possible out of the spectra from the slip tip head down to the tail end of the spectra. At this point, take your slide ring and carefully slide it onto the tail end of the spectra. Pull the slide ring all the way up the spectra so the slide ring is up by the slip tip head.. Once again pull all the slack out of the outer core of spectra.
Step Six: Tying the Right Knot
At this point we need to tie a stopper knot. The correct knot to use on a spectra slip tip is called a Double Overhand Stopper Knot. To see it demonstrated properly please view the video. The knot needs to incorporate the inner core of spectra. That completes the Spectra Slip Tip Re-Rig process.
https://www.youtube.com/watch?v=eP0hhUr3BCQ&t=7s