Replacing the Bands on the Neptonics Double Roller Speargun
https://www.youtube.com/watch?v=TxtyASIvISw&t=3s
How to Replace the Bands on the Neptonics Double Roller Speargun
There are many roller spearguns out on the market today. They all have their pros and cons. Rollers are not easy to re-power when the time comes to replace the bands on the speargun. The Neptonics Double Roller Speargun is not immune to these challenges. The benefits of being balanced and the amazing range of the speargun outweighs the drawback of difficulty re-powering. In order to help meet this challenge, we have made this video and write up explain how to replace the bands on the Neptonics Double Roller Speargun.
Step One: Remove Double Roller Head Hardware
The first step in changing out the bands is to remove the double roller head hardware. This is done by removing the four retaining screws. Then you need pull the existing bands off of the rollers that are on the non-welded side of the roller head. Once the bands are off that side, you can pull off the roller wheels on that side. Use some force to pull the welded side of the roller head out from the speargun while the bands are still in place. You can keep the risers in place on the speargun, though they may want to come or fall. From there, use a sharp pair of scissors to cut away the old bands.
Step Two: Tie Bands and Pull Them Through the Band Slot
One of the requirements to properly replace a Neptonics Double Roller’s Bands is to be able to tie your own bands. If you are not familiar with that process here is another blog post or video that demonstrates how to tie your bands. For the double roller, tie one side of your bands and pull the bands through the existing band slot. Silicone spray makes this process easier. Make sure the shorter band is in the band slot closest to the muzzle. For the 54 Double roller, the band sizes are 44” on the first band and 48” for the second band when you are cutting band material.
Step Three: Finish Tying the Bands
Once the bands are pulled through you need to finish tying the other side of the bands on the speargun. Make sure you tie the bands on the top side of the speargun. If you tie the bands on the bottom of the speargun, you will have to stretch the bands over the top of the speargun, which is easier said than done.
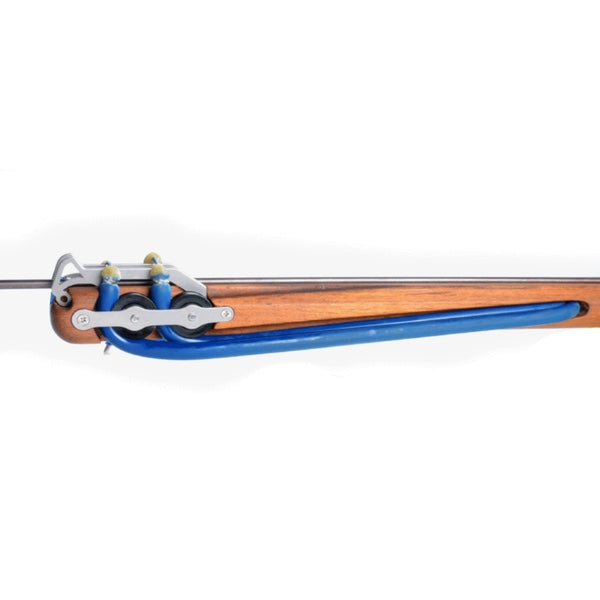
Step Four: Hook The Wishbones on the Hardware and Replace the Roller Head
This is once again easier said than done. Take the welded side of the roller head with the roller wheels on the pegs. Then, place the band wishbones on the roller wheels in the correct order. The shorter band should be in the further back (closest to the trigger mech) of the two roller wheels. Use some leverage and put the welded pegs through the roller muzzle of the speargun. This should take some effort as the bands need to be pretensioned for the speargun to work properly. Once you have the welded side of the roller placed, you should screw in the two retaining screws on the roller head.